As a photographer there are so many styles of photography.
From landscape or portrait photography to food, architecture, fashion and many more.
As a professional photographer, aspiring pro, or even an hobbyist, you learn pretty early on that lighting is everything. And not having right light can make or break your shot.
Which is why night time photography is a skill that you might not yet have in your arsenal.
I want to help you change that.
This article is designed to help you understand how to take night photos and learn the art of long exposure — from the gear and accessories to essential night photography tips for overcoming low light obstacles and capturing the perfect night time shots.
I’ll cover this in three parts:
- Why should you learn to take night photos to begin with?
- What are the biggest obstacles to taking great photos at night?
- What key components matter most for taking incredible night time shots?
Finally, we’ll cover the specifics of a few popular long exposure shots that you might want to test out for yourself.
Soon you’ll be ready to venture off into the evening, all geared up with the equipment on our long exposure checklist (if you don’t already what you need), all set to start learning how to take some awesome night time photos.
You ready?
Part One: Why you should learn to take photos at night?
For many photographers, as the light wanes, as does their time out shooting. What you might not have considered are the many benefits to learning how to shoot at night. But since you’re here, check out these incentives for learning how to snap low light shots.
Grow your skill set as a photographer
One of the first things you’ll discover as you learn to shoot in low light is that the automatic settings on your camera aren’t as useful anymore. At night, you’ll be shooting in manual mode. Shooting in manual is a tougher skill to master. It requires a greater feel for the light sources and a deeper understanding of your camera’s settings and capabilities. Once you have the experience, you’ll be a more versatile as photographer. You’ll be able to apply these lessons to shooting in other settings as well. Not to mention the expanded portfolio bodes well for booking gigs, too.
New shots in familiar environments
You know how you might visit a neighborhood in the evening and not recognize it in the day time? That’s what it’s like shooting at night. The most ordinary spot during the day, when illuminated with the lights, can be vastly different.
Crowded areas can turn peaceful or eerie. Glowing city lights reflecting off of buildings and structures create unique settings. Varying degrees of darkness from sun down through midnight.
It’s a great opportunity to revisit old shooting locations and have a brand new experience.
Capture some truly unique photos
As I mentioned, shooting at night lends itself to truly unique photo opportunities. From the foggy night shot, epic city landscape photography, or night time portrait, shooting at night lets you add some truly original work for your portfolio.
Kurt Kohlstedt, founder of WebUrbanist said of night photographers, “[they] are some of the most captivating “writers” in the medium, with a fascinating art and unique history.”
That could be you he’s talking about.
Now let’s get into the biggest challenges of taking night time photography.
Part Two: What are the biggest obstacles to taking great photos at night?
Building a great portfolio of cityscapes, light trails, and long exposure photos can really show off your range as a photographer.
But it isn’t without its challenges.
These are the key challenges you should be aware of when taking long exposure night photography. It’s important to note that all night photography doesn’t require long exposure. But a lot of it does.
Lighting conditions
This is an obvious one.
When taking photos at night, light is in high demand. And it’s usually in flux from the hours of sunset to midnight.
But that’s the whole point.
Long exposure photography (as defined by Wikipedia) involves “a long-duration shutter speed to sharply capture the stationary elements of images while blurring, smearing, or obscuring the moving elements”.
Learning to read and recognize the lighting conditions you’ll be working with helps you become a better photographer.
Camera shake
When shooting with slower shutter speeds, you might have noticed photos might come out blurry when holding the camera in your hands.
Long exposure photography almost always calls for a tripod — preferably a sturdy one.
Movement in your camera while your shot is exposing can ruin your shot. With long exposure photography, you might expose your shot from 1 to 30 seconds or more depending on the effect you’re trying to create.
You’ll want to have the necessary equipment to prevent camera shake handy.
Visibility
When shooting in the dark over time, our eyes start to adjust to the darkness. Homosapien problems. That means that your camera screen might appear brighter and affect the way you’re seeing your shots and adjusting your settings as a result.
Just knowing this is happening is helpful as you think about how to set up your shots.
Not to mention simply being able to see the settings on your camera to adjust them. Having a flashlight or head torch to help navigate in the night might come in handy.
Weather conditions
Night shoots can be longer as it takes time to position and prep the shot you’re trying to get before you take it. They can also be colder depending on when and where you’re shooting.
On the art of taking beautiful night-time photos, award-winning photographer Stuart Palley told TIME Magazine, “Ninety percent of it is preparation and 10% of it is the actual execution.”
If you’re in a windy city or far out of the way place to capture some landscape shots, you don’t want to have to cut your shoot early because you weren’t dressed appropriately. Keep that in mind.
Part Three: What key components matter most for taking incredible night time shots?
In this section, I’m going to cover three segments related to taking great photos at night.
We’re going to go over:
- How the fundamentals of photography feed into everything you’ll learn about night photography
- What key camera settings you need to understand
- What key equipment to consider (cameras, lenses, and accessories)
A) The Fundamentals of Photography (At Night)
Have you heard of the three pillars of photography? They are aperture, ISO, and shutter speed.
Aperture is defined by how much light is allowed to pass through the camera.
A larger aperture (e.g. F1.8 or F8) means more light passes through the camera. A smaller aperture (e.g. F18 or F22) means that less light passes through the camera.
Generally, at night, you’ll be shooting at larger aperture. Although, if you want an increased depth of field for your shot, you can use a smaller aperture and use other settings to adjust the amount of light that you let in.
Which leads me to ISO.
ISO is defined by how sensitive to light your cameras digital image sensor is.
A larger ISO (e.g. 3200 or 6400) means that your photos will be brighter. A smaller ISO (e.g. 100 or 300) means that your photo will be darker. According to Nikon, “with today’s digital cameras you can sometimes go as low as 50 or as high as 204,800“ with ISO.
For night time photography many photographers suggests keeping your ISO as low as possible. A lower ISO leaders to a sharper (less noisy) image.
However, some higher end cameras are able to maintain a higher quality image even shooting with ISO as high as 6400.
But there is another way to let more light into your shot without increasing your ISO.
Which leads me to the third pillar, shutter speed.
Shutter speed is defined by how long you expose light on the sensor of the camera. Hence, long exposure photography.
Shutter speeds are usually in fractions of a second. For example, they can be 1/4 (one-fourth) of a second to 10 seconds to 1/1000 (one-thousandth) of a second, or faster.
Of course, slower shutter speeds are more likely to create motion blur, while faster speeds freeze images in motion.
For night photography, shutter speed is one of the most important elements to creating unique and creative effects with your photos.
You can create light trails from cars on a busy road, star trails from the night sky, or the motion of a busy street in the city. You can also use a tripod to steady your camera and just let in the light.
B) Key Camera Settings and Functionality
As I mentioned before, one of the most beneficial parts of learning night photography is that you’ll get really familiar shooting in different settings, environments, and lighting conditions.
These are the settings you’ll want to familiarize yourself with before you start shooting at night or with long exposure.
Manual Mode
In manual, you’re able to adjust all the key settings on your camera. And you’ll need to. Shooting with manual lets you test and learn what lighting works best with which setting for the desired effect on your shot.
The primary alternative setting for shooting at night is Bulb mode. Bulb mode means that the shutter will stay open as long as your finger (or cable release) holds down the shutter. The primary benefit being that you can use exposures longer than the 30 seconds allowed naturally on most DSLRs.
RAW Formatting
Shooting in RAW is recommended for most low light photography. Saving images as RAW files means that they capture more details. Not only that, you’re able to edit color details like white balance or dial up or down the exposure in an editing program like Adobe’s Camera RAW or Lightroom after the fact.
This is especially useful for photos where you may have over or under exposed your shot in the field.
However, there are a few drawbacks to shooting in RAW.
Image file sizes are much larger. You’ll want to be sure to clear your current memory card before you go out shooting and maybe bring an extra one in case you’ll be shooting for a longer time.
Image Stabilization
If you’re shooting hand held at night, it’s ideal to have a camera with a quality image stabilization system. It lets you take photos at slower shutter speeds while maintaining the sharpness of the photo.
There are limits, though. Fortunately there’s a rule of thumb about focal length versus shutter speed to make it easier to remember.
Jim Harmer, Founder of Improve Photography explains the rule like this: “Take the focal length you’re shooting at and make the denominator in your shutter speed. Simple! So if you’re shooting with a 50mm lens, the rule says that you shouldn’t pick a shutter speed slower than 1/50 if you want a sharp picture.”
Image stabilization allows a little more leeway, but for sharp images, you’re better off using a tripod for longer exposure shots.
In contrast to shooting handheld, when using a tripod, Joshua Dunlop of Expert Photography suggests you “turn off any image stabilization as it will be counterintuitive, thinking that the camera is moving.“
And most of the time when shooting longer exposure photos, you’ll be shooting with a tripod.
Long Exposure Noise Reduction
Another setting to consider is long exposure noise reduction (LENR).
When this setting is enabled during a long exposure, the camera takes a duplicate image during the exposure. This is called a dark frame. This image is devoid of noise. Your camera will compare the two image and reduce the noise of the photo.
Complicated (but awesome), right?
Fine Art Photographer Brian Peterson says, that you should only enable long exposure noise reduction when you can afford to double your exposure time.
“For example, if you are shooting on a moonless night when conditions are not changing, you can afford to double your exposure time. But if you are shooting star trails as multiple images for stacking in post-processing, you definitely cannot afford to double your exposure time because large gaps will result.” says Peterson.
(We’ll talk about stacking a little later).
On to the gear.
C) Equipment to Consider (Cameras, Lenses, and Accessories)
I. Cameras
When shooting long exposure, whether you’re practicing night landscape photography, star trails, or other outdoor environments, a full frame camera is your best bet because of their larger sensors.
Outdoor photographer Justin Katz of CreativeLive suggest that “most professional night photographers will agree that full-frame is the way to go, as it allows you to shoot a wider scene, which is often the desired composition for night photography.”
If you’re in the market for a full-frame camera, the Canon EOS 6D is a light, affordable, full-frame DSLR with sensitive low-light focusing capabilities.
If you’ve got a little more to spend, the Nikon D750 is also a great option.
In addition, for shooting in low light, you’ll want a camera that performs well at higher ISOs. That way, you can capture more crisp, detailed images at ISOs of up to 6400.
Per Katz, both “Sony cameras, like Nikons, perform very well at high ISOs, and they also have a fairly good live-view experience”.
II. Lenses
For selecting the best lens for low-light and long exposure photography there are a few things you can use to weigh your decision.
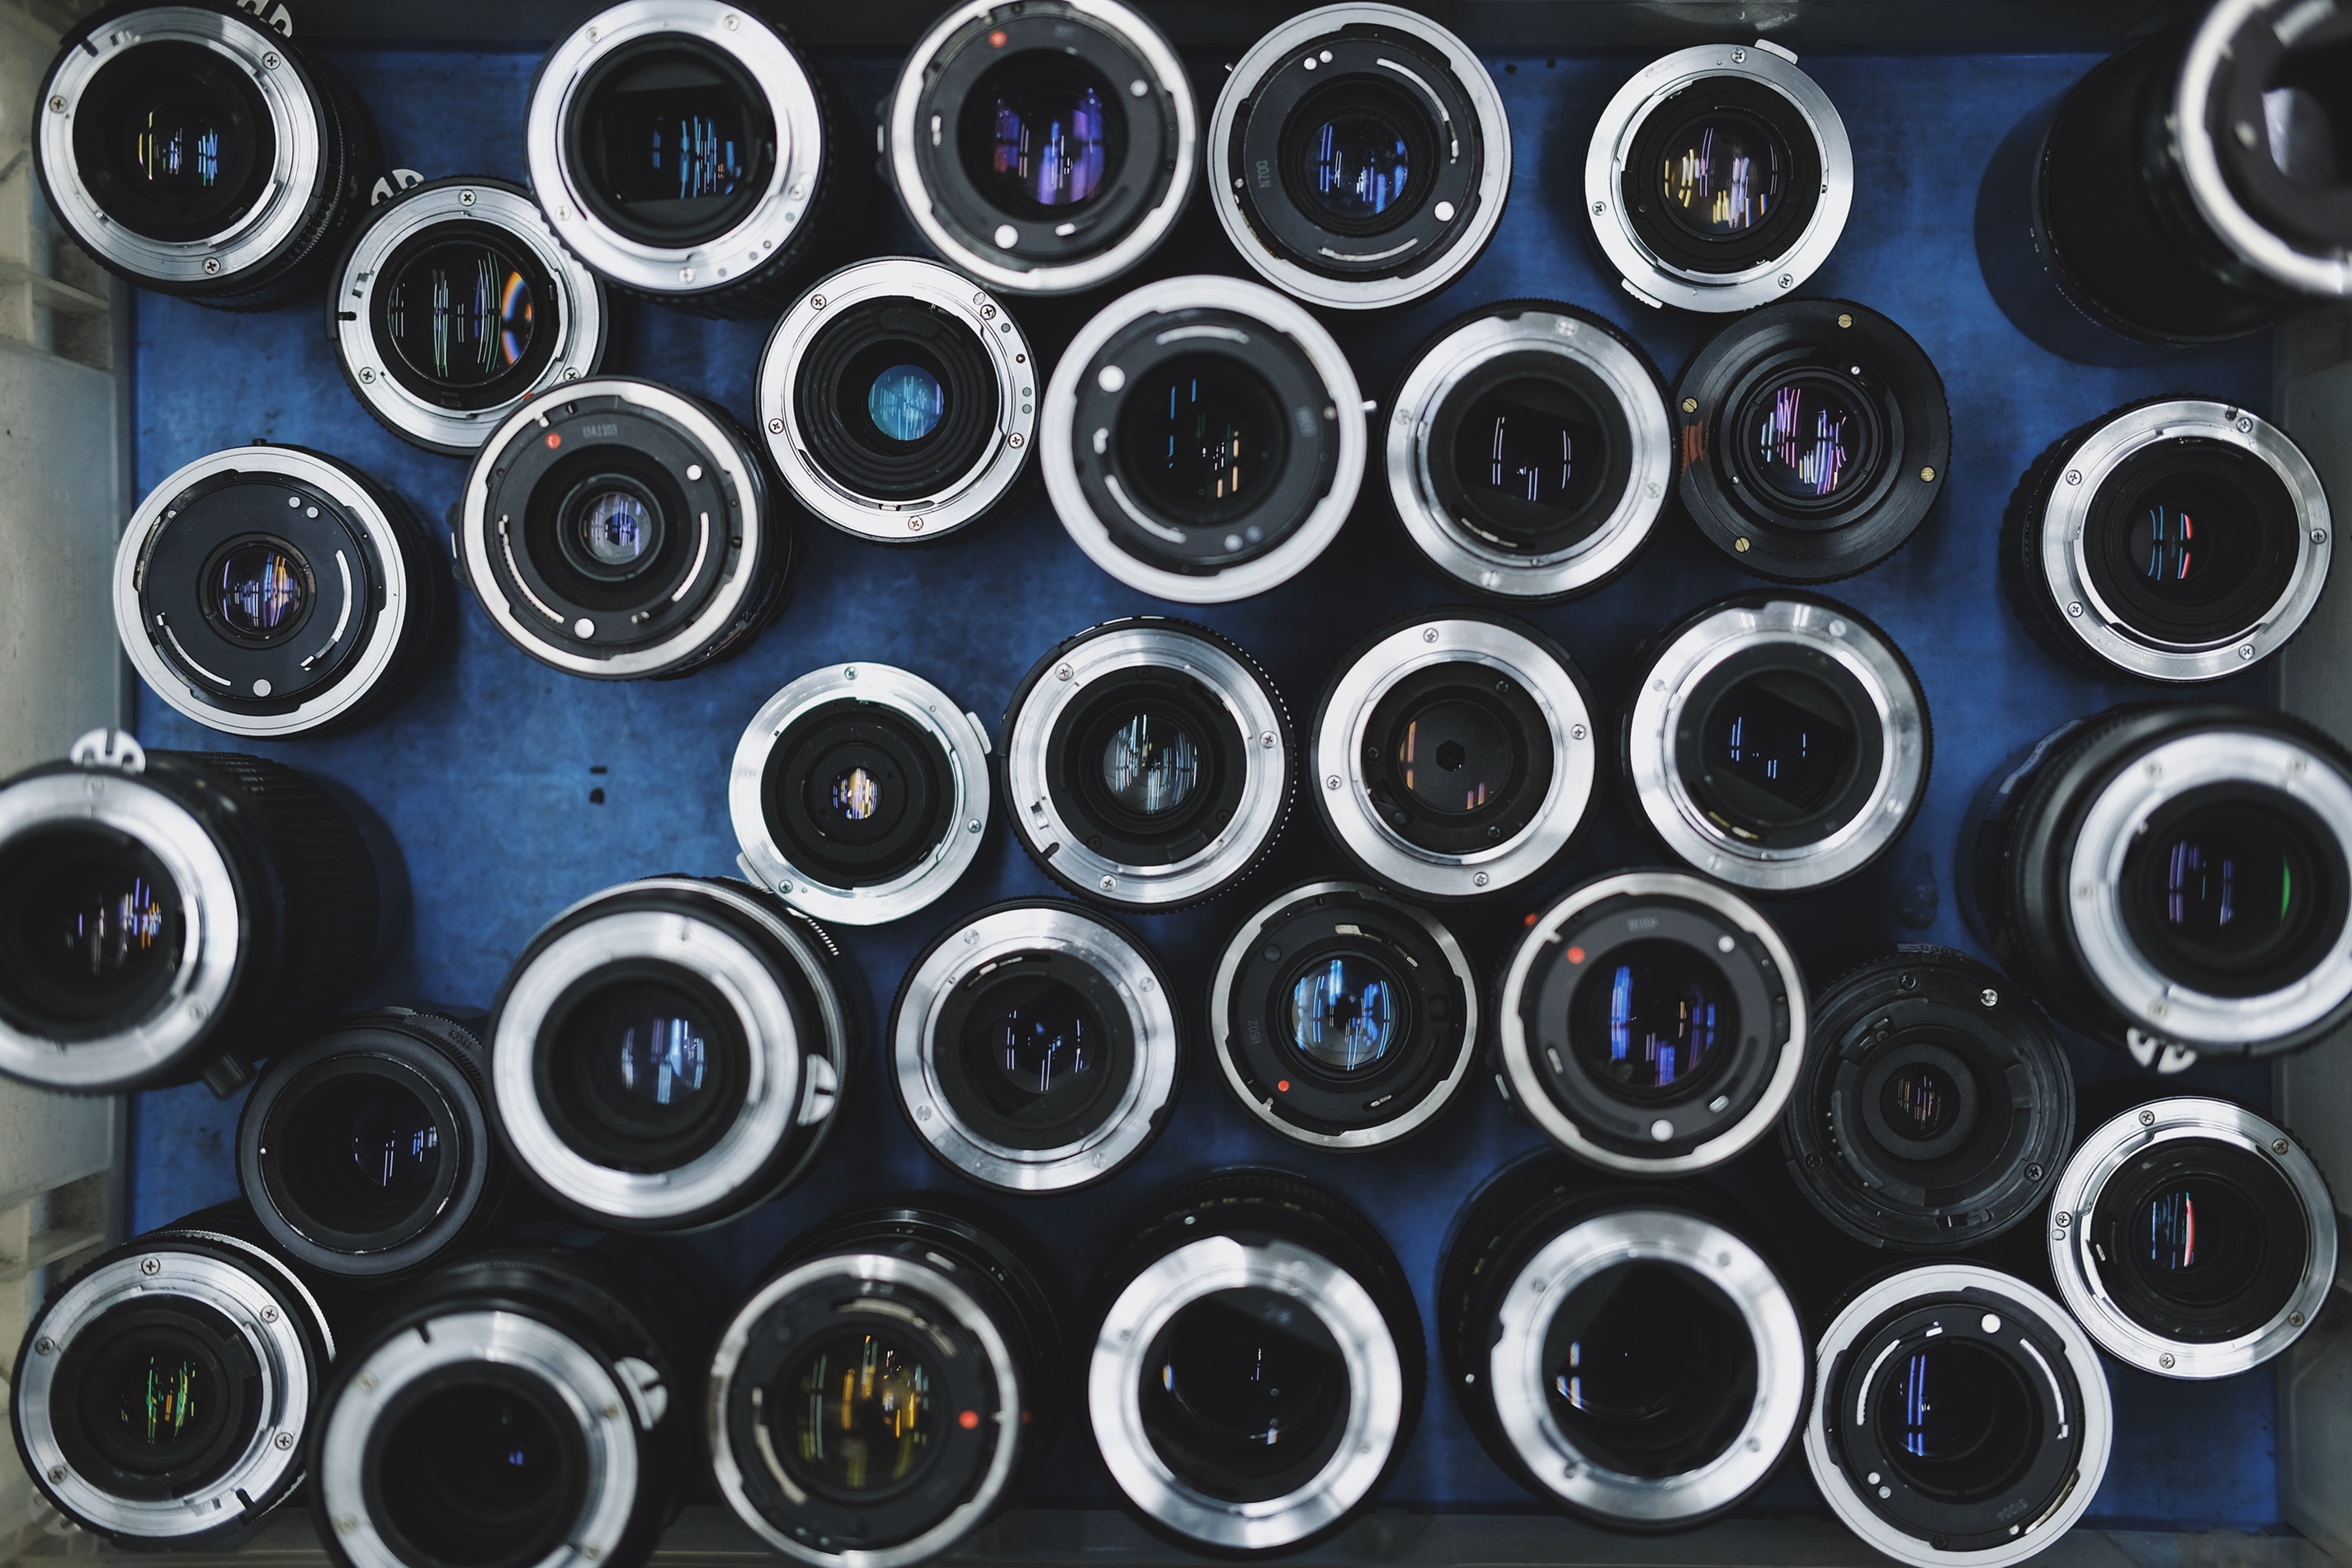
Ideally, you want a high aperture (or fast) lens. Again, higher aperture means that it lets in more light. That doesn’t mean that you’ll always shoot at the lowest f-stop, but that capability is good to have for low-light situations.
You’ll find that prime lenses with a fixed focal length (e.g. 50mm f/1.8 or 35mm f/1.8) tend to have lower f-stops.
Typically, for long exposure photography, you’re shooting wider images to capture more of the environment and detail.
Professional photographer Tricia Krefetz says that, “Wider lenses are generally more forgiving with focus in the dark, and they deliver incredible sharpness throughout the scene, especially at higher F-stops like F16, F18 or F22.”
III. Accessories
Unlike shooting in the day, the typical “kit” of resources that you should have handy for shooting at night is a little more robust. Here’s a quick list of the accessories to consider bringing along.
1) Tripod
A tripod is the most essential accessory for long exposure and night photography. It’s the most tried and true method for keeping your camera steady during long exposure.
The ideal combination is something study and light. Sturdy so it doesn’t blow over or move around (defeating its purpose), and light so it’s easy transportable.
Tripods are typically made of aluminum or carbon fiber. Carbon fiber tripods are lighter but usually twice as expensive. Aluminum tripods are cheaper but can be sturdier and support a heavier load.
If you don’t want to lug around a tripod, you can get creative and find a level spot to place your camera. I’ve heard of people who carry around bean bags for that purpose. Go figure.
2) Remote shutter or cable release
Similar to a tripod, a remote shutter or cable release helps you fire your camera without the risk of camera shake for those long exposures.
These are useful when shooting in Bulb mode. You can pick them up for pretty cheap, too.
3) Head torch or flashlight
It might not seem necessary in the moment, but having a head torch or flashlight for a night shoot can come in really handy. I recommend the headlamp because of the hands free aspect. It’s preferable to holding a flashlight in your mouth, or fumbling around with camera settings with your one free hand.
You can also use the flashlight on your cell phone if it has one, but it’s better to conserve that battery life, especially if you’re shooting in a remote location.
Either way, you can pick up a quality LED headlamp or flashlight for under $20 on Amazon.
4) Lens hood
Lens hoods are beneficial for keeping light from outside your frame from entering your shot. If you’re shooting at night in a city, a bright street light just out of the frame can cause a glare and impact your shot.
They’re not essential, but they can make a difference in the richness of your photos in certain circumstances.
5) Intervalometer
An intervalometer is a device that plugs into your camera and releases the shutter at pre-planned intervals of time for the exposure time you select.
They’re great for reducing camera shake and help for creating cool advanced techniques like shooting star trails or photo stacking.
6) Large memory card (and extras)
If you recall, when shooting long exposures at night you should capture them with RAW formatting. Shooting in RAW format takes up more battery life. Not to mention that you will likely be shooting lots of test shots. It’s best to have a large memory card handy for a night shoot.
7) Extra batteries
Extra batteries are always useful if you’re going out on a shoot. But if you’re shooting long exposures, your battery will die out faster, too. Better safe than sorry.
Bonus: How to Take Specific Incredible Long Exposure Photos (Camera Settings and Equipment)
Cityscape Photography
Even if you fancy yourself a portrait photographer, everyone loves some quality cityscape photography. A beautiful city skyline shot or bridge is just classic.
Set your camera to manual mode, and lower your ISO to 100 for starters. You can start your aperture higher, maybe f/16 depending on the depth of field you like. Lower it as necessary. Then test various shutter speeds until you see what works best.
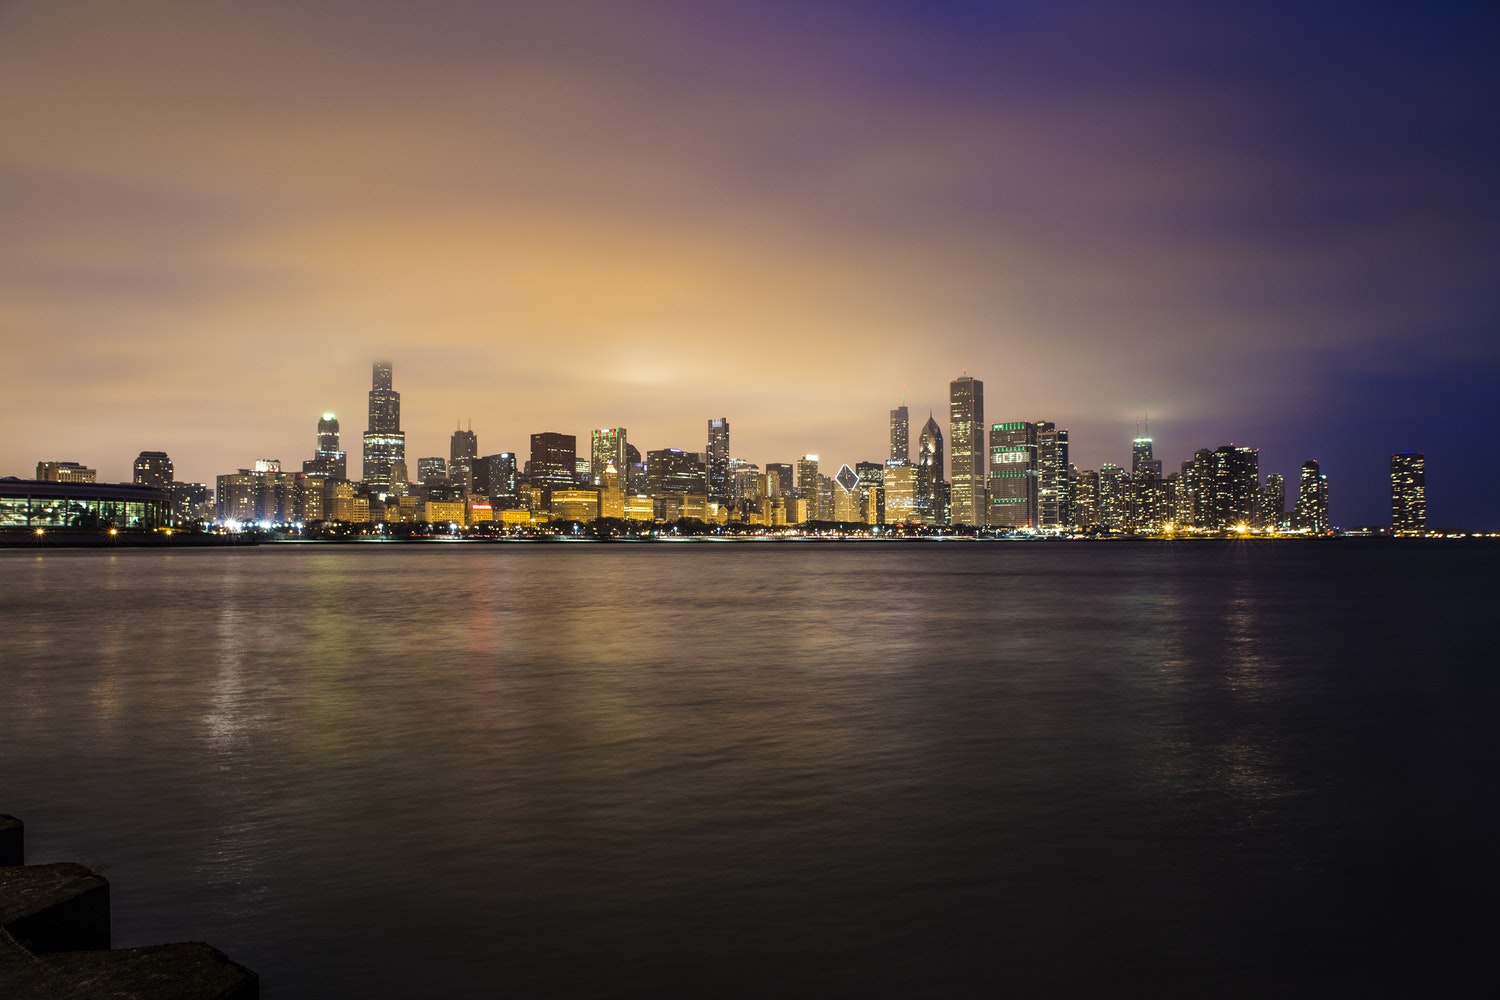
This shot by Jeff Brown in Chicago was taken at:
ISO: 100 | Aperture: f/5.6 | Shutter Speed: 6s | Focal Length: 24mm
Light trails
Light trails do a great job conveying motion. You can create some really beautiful shots above a highway, or on a busy street with the passing lights from the cars.
Similar to standard cityscape photos, set your camera to manual, and lower your ISO to 100 to begin. Start your aperture around f/10 and lower it as necessary. It’s nice to have the contrast between the light trails and the other details in the photo. For light trails, your shutter speed can be anywhere between 3 to 10 or more seconds.
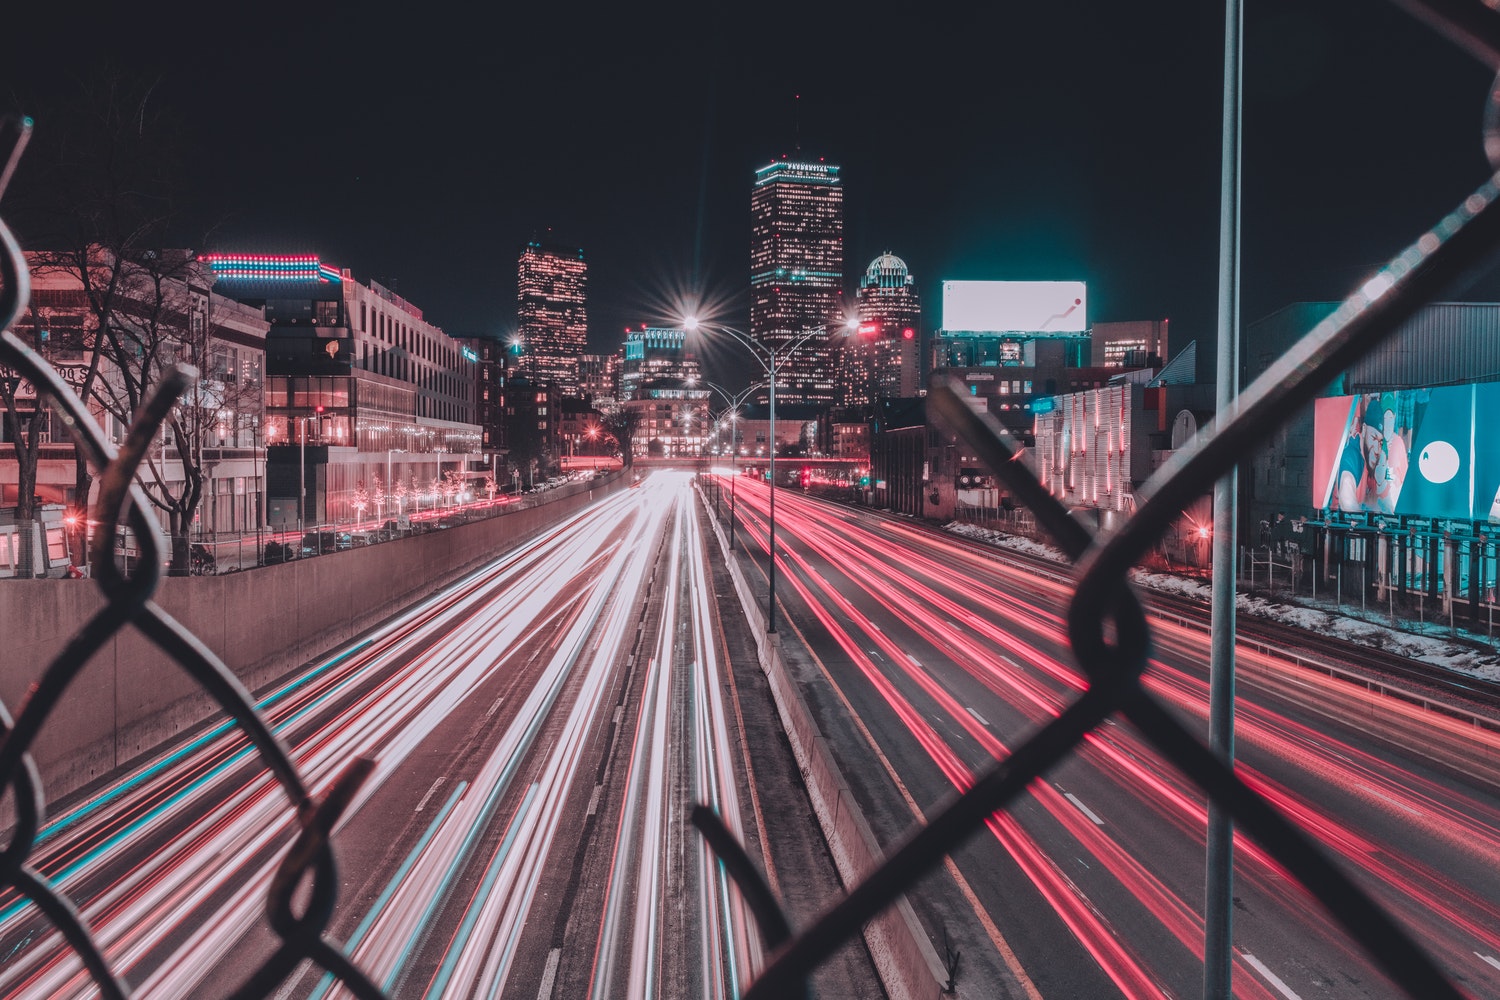
This photo by Alex Iby in Boston was taken at:
ISO: 200 | Aperture: f/8 | Shutter Speed: 15s | Focal Length: 24mm
Star trails
Star trails are one of the more “advanced” long exposure techniques. You’ll need a tripod, a cable release, a camera that can shoot in “Bulb” mode, and a lot of battery life.
After you steady your tripod, focus your camera where you want to shoot and be sure to switch to manual focus to maintain your depth of field when you release the shutter.
Most photographers that shoot star trails using a technique called stacking. That’s means you’ll shoot multiple exposures of the same scene over some time (say 30 minutes) and layer them together in Photoshop or a program like StarStaX.
With star trails, set your aperture to a fairly large setting, and your ISO to 800 for starters. The larger ISO will help to capture more stars. If you have a camera that can handle higher ISO, that’s beneficial.
Depending on the amount of stars you want to capture, you might be shooting between 30 minutes to a few hours. Set your intervalometer to expose for about 30 seconds each exposure, with 1-2 seconds in between each shot.
Petapixel has a great article about how to compose star trails in photoshop when you’re done capturing your photo.
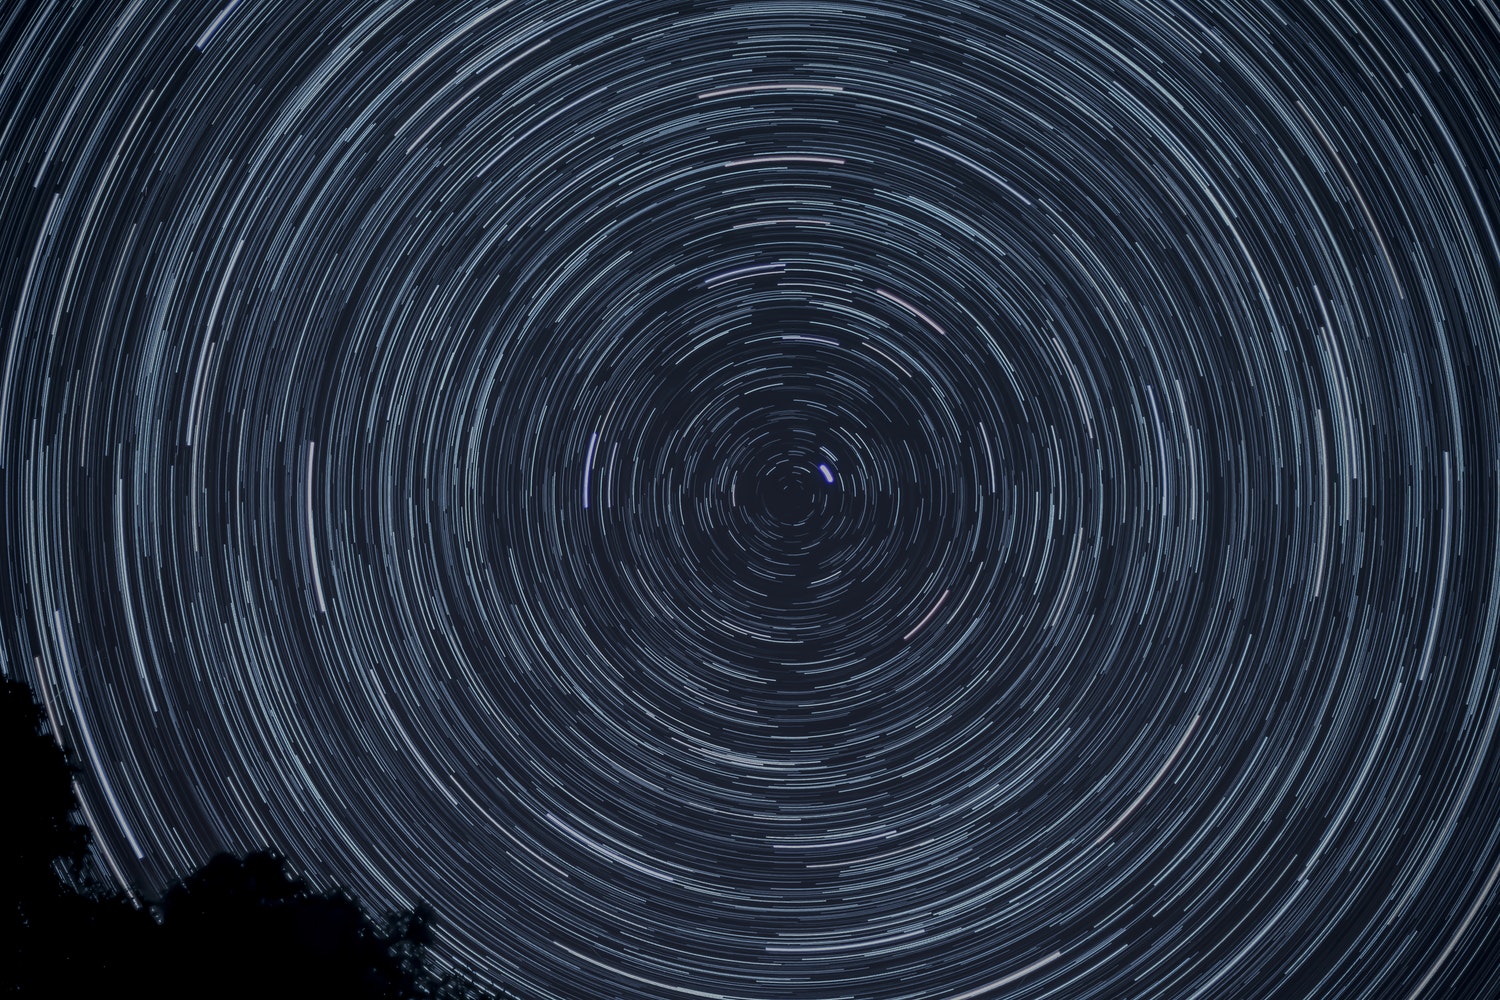
Patrick McManaman captured this awesome shot in Tolland, Connecticut at:
ISO: 800 | Aperture: f/1.8 | Shutter Speed: 3s (per exposure) | Focal Length: 50mm
The moon
A good full moon shot is always good for racking up “likes” on IG. Especially with a nice introspective caption.
To capture a good snap of the full moon the first thing you’ll need is a lens with a longer focal length. Experts recommend a minimum focal length of 300mm. The longer the better.
First, set your camera to manual. Given the moon’s brightness on a night with clear skies, an ISO of 100 or 200 should be okay. Set your aperture anywhere from f/4 – f/11. Your shutter speeds will be much faster photographing the moon. Start with 1/125 and increase as necessary.
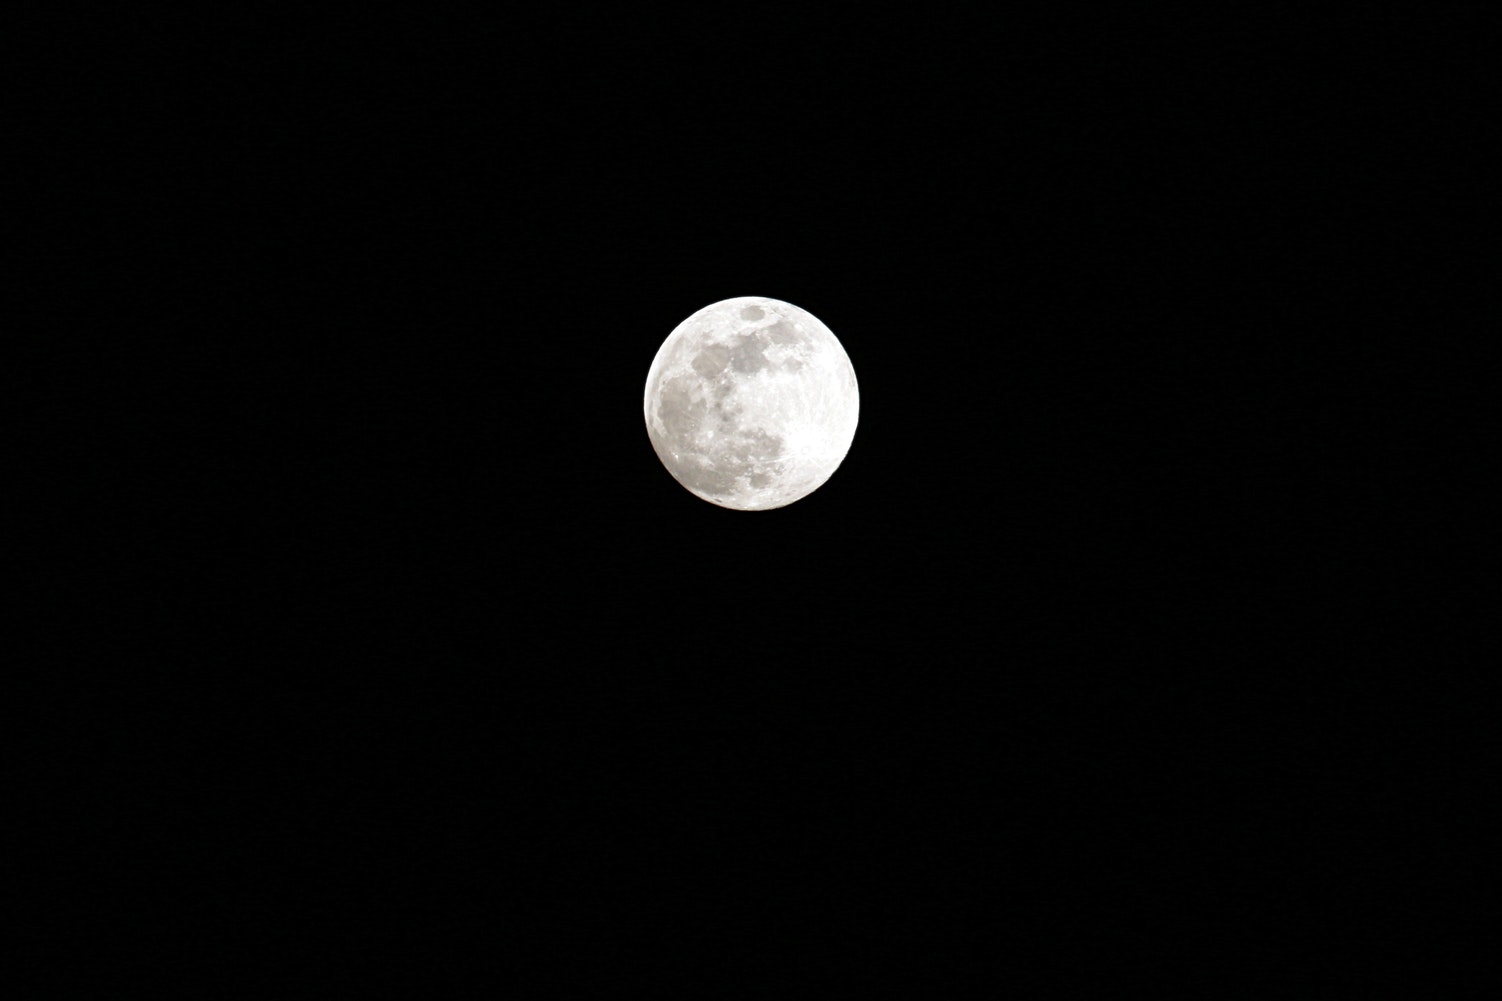
This photo by Sara Santandrea was taken at:
ISO: 100 | Aperture: f/6.3 | Shutter Speed: 1/4000s | Focal Length: 300mm
Fireworks
Fireworks photography alone is a great reason to dive into longer exposure photography. There’s something magical about it right?
Similar to standard light trails, set your camera to manual and lower your ISO to 100 to begin. Set your aperture to a smaller f-stop and adjust as necessary. Shutter speed for fireworks will vary, but depending on the burst, anywhere from 3 – 15 seconds should do.
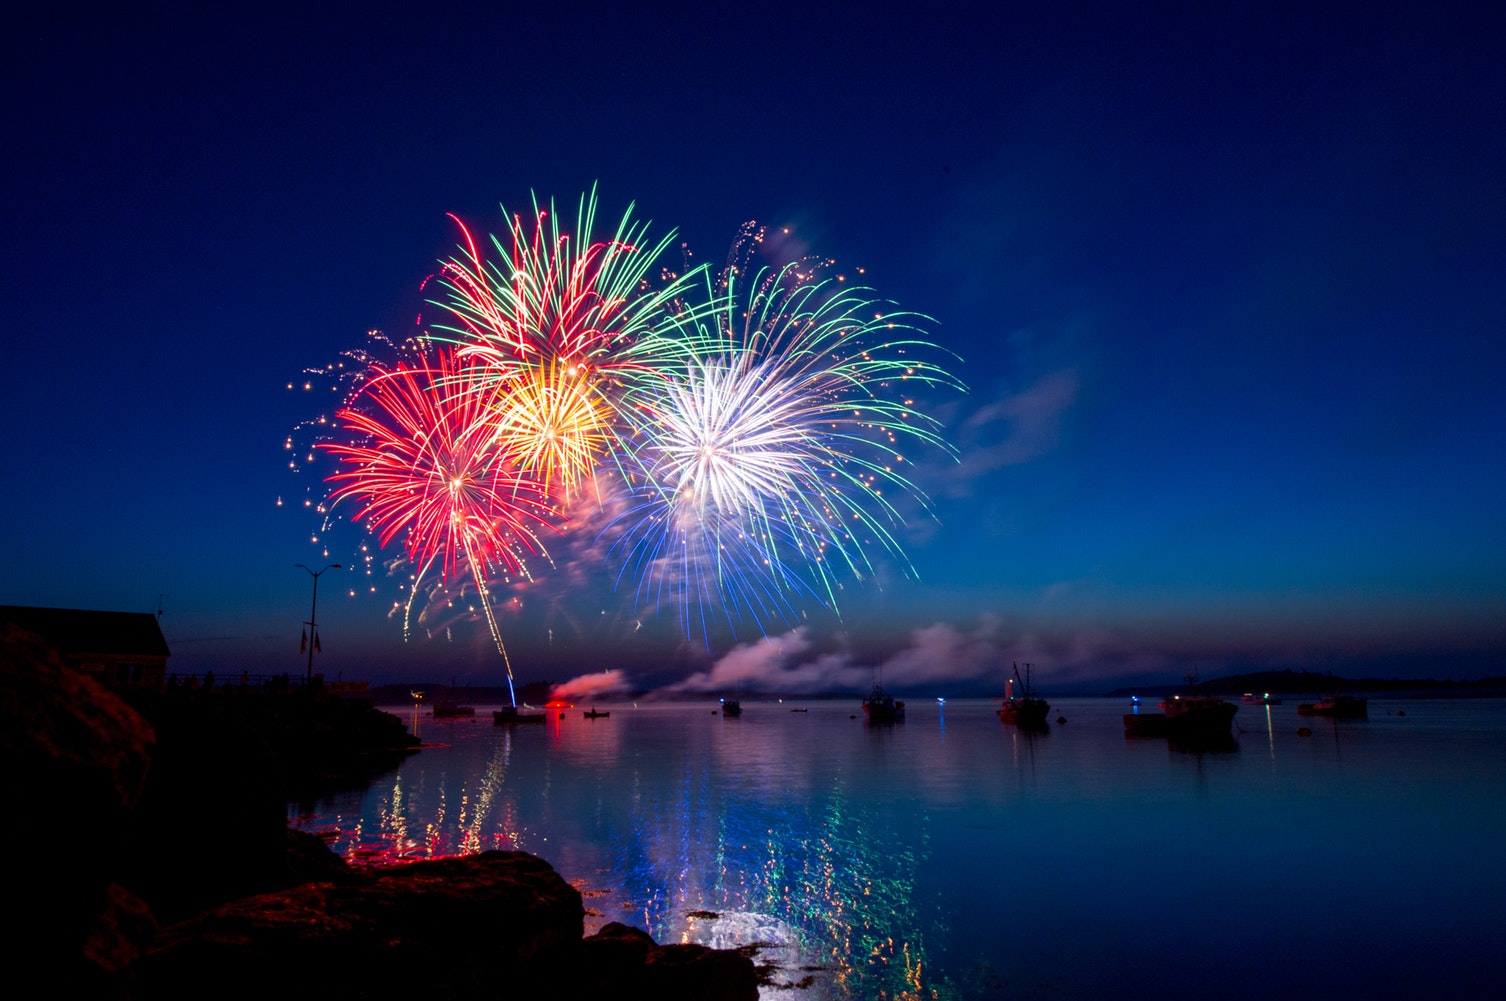
This photo from Ray Hennessy of the fireworks at Maine Harbor was taken at:
ISO: 200 | Aperture: f/8 | Shutter Speed: 3 seconds | Focal Length: 24mm
Conclusion
Learning to take great low light and long exposure photos can be challenging. But the time, effort, and experience you gain from it are ultimately rewarding.
You open yourself up to be able to go shooting all 24 hours of the day.
Just remember to be prepared for the shoot beforehand, experiment with an open mind, be patient, and have fun with it.
Sign up for our email list for access to our handy “Long Exposure Checklist” for your next night shoot.
